


Blender: How To Create And Rig The Iron Giant
Blender: How To Create And Rig The Iron Giant
Last updated 10/2022
MP4 | Video: h264, 1920x1080 | Audio: AAC, 44.1 KHz
Language: English | Size: 19.08 GB | Duration: 19h 40m
Last updated 10/2022
MP4 | Video: h264, 1920x1080 | Audio: AAC, 44.1 KHz
Language: English | Size: 19.08 GB | Duration: 19h 40m
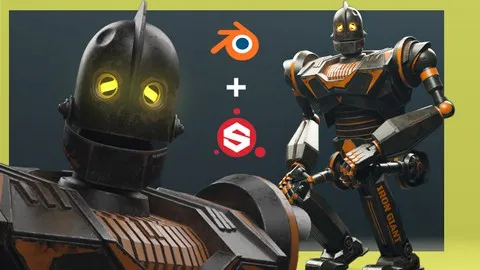
learn how to create THE IRON GIANT we will discuss modeling, unwrapping, Rigging, Texturing and Rendering with Blender
What you'll learn
modeling the Iron giant from start to finish
unwrapping the whole model from start to finish
Rigging, we will learn how to rig the robot so you can make it ready to animation
Texturing, we will use PBR mterial to make the robot looks realistic by using Substace Painter.
Rendering, we will make quick render to the final result with Cycles and Eevee.
Requirements
you need a computer
Download Blender 2.91 from the official website.
Description
Hi everyone, my name is Marwan Hussain, I'm a 3D artist I made a new course about Iron Giant but this course is different from my other courses on the Udemy platform, in this course I will teach you how to make rigging, we will learn how to r rig this robot from start to finish.Before we jump to that let's talk about what we will do in the beginning, in the beginning, we will learn how to model the whole robot from start to finish, this kind of modeling call Hard surface, it's a lot of fun we will learn how to shade your model correctly, how to use Bevel modifier symmetry, and other modifiers,until we got a nice smooth result at the end of this section ( modeling ) After that we will jump to the next section I will call it Unwrapping, we will learn how to unwrap hard surface modeling correctly and reduce the UV distortion at the minimum I will unwrap all the pieces one by one so you could learn how to do that and make it easier for you.After the unwrapping section, we will start with the rig journey, in this journey, we will learn how to use armature and how to rig all necessary joint so you could be able to move your robot and make it ready for some animation. the last section will be the Texturing and Rendering, this is very important section because the final result depends on it.we will export the project to Substance Painter and we will start the texture journey there, we will learn how to make realistic PBR material from scratches step by step and we will learn how to add the wether effect like rust and dust so it looks old and dirty, all of that will done with Substance Painter after we finish texturing journey we will import the PBR texture back to Blender to make the render.I will render the scene with Cycles and Eevee, and after that, we will make some quick post-processing with the compositor.
Overview
Section 1: Modeling
Lecture 1 02_course overview
Lecture 2 03_Brief introduction to Blender interface
Lecture 3 04_Set Up the scene and add the Blueprint images
Lecture 4 05_Start creating the head
Lecture 5 06_Adding eye to the head
Lecture 6 07_Creating the head hat
Lecture 7 08_Adding eye details
Lecture 8 09_Create the mouth shield and joins
Lecture 9 10_Creating the neck
Lecture 10 11_Creating the armor
Lecture 11 12_Creating the armor 2
Lecture 12 13_Creating the armor 3
Lecture 13 14_Creating the armor 4
Lecture 14 15_Creating the armor 5
Lecture 15 16_Create the neck base
Lecture 16 17_Starting with the arm part 1
Lecture 17 18_Starting with the arm part 2
Lecture 18 19_Starting with the arm part 3
Lecture 19 20_Starting with the arm part 4
Lecture 20 21_Creating the fingers part 1
Lecture 21 22_Completing creating the fingers
Lecture 22 23_Fixing the elbow joint
Lecture 23 24_Creating the Belly
Lecture 24 25_Create the hips joint
Lecture 25 26_Completing the hips joint
Lecture 26 27_Starting with the leg
Lecture 27 28_Starting with the leg part 2
Lecture 28 29_Creating foot details
Lecture 29 30_Completing the foot
Lecture 30 31_ Adding the final detail to finish modeling section
Section 2: Unwrapping
Lecture 31 32_quick intro to unwrap
Lecture 32 33_Unwrapping_starting with the head part_1
Lecture 33 34_Unwrapping_starting with the head part_2
Lecture 34 35_Unwrapping_starting with the head part_3
Lecture 35 36_Unwrapping_starting with the chest part_1
Lecture 36 37_Unwrapping_starting with the chest part_2
Lecture 37 38_Unwrapping_starting with the chest part_3
Lecture 38 39_Unwrapping_starting with the belly
Lecture 39 40_Unwrapping_starting with the hips
Lecture 40 41_Unwrapping_starting with the legs
Lecture 41 42_Unwrapping_starting with the foot
Lecture 42 43_Unwrapping_starting with the arm part_1
Lecture 43 44_Unwrapping_starting with the arm part_2
Lecture 44 45_Unwrapping_starting with the arm part_3
Lecture 45 46_Unwrapping_Unify the model parts size texture
Section 3: Rigging Section
Lecture 46 47_Rigging_part1_starting with the leg
Lecture 47 48_Rigging_part2_Add names and make IK control
Lecture 48 49_Rigging_part3_connect the bons with the Leg and create new bons
Lecture 49 50_Rigging_part3_create the arm bons and connect them with the body
Lecture 50 51_Rigging_part4
Lecture 51 52_Rigging_part5
Lecture 52 53_Rigging_part6_ copy the bones to the right side
Lecture 53 54_Rigging_part7_change the bones to shapes
Lecture 54 55_Rigging_part8_display bones as shapes_2
Lecture 55 56_Rigging_part9_Adding colors to the controllers
Lecture 56 57_Texturing_ preparing the model adding material to each parts
Lecture 57 58_Texturing_sending the project to substance painter and bake the texture
Lecture 58 59_Texturing_Start with substance painter and create first material
Lecture 59 60_Texturing_Adding some text and stickers to the head
Lecture 60 61_Texturing_Adding Light material to the Eye
Lecture 61 62_Texturing_starting with chest
Lecture 62 63_Texturing_adding mterial to the neck and the hips
Lecture 63 64_Texturing_ adding material to the arms
Lecture 64 65_Texturing_starting with the left Leg
Lecture 65 66_Texturing_adding mterial to the right leg
Lecture 66 67_Texturing_ adding hard surface detail to the model
Lecture 67 68_Texturing_export texture from substance paitner to Blender
Lecture 68 69_Rendering_render the model with cycle and Eevee
Section 4: project files
Lecture 69 project files for this course
Section 5: Bonus
Lecture 70 More about Blender
All levels